Sharpening a single-bevel knife|Choosing a Japanese Knife
Sharpen a yanagiba, deba or usuba in 8 diagrams: whetstone grits, laying the bevel flat, the burr and the back.
Single-bevel Japanese knives such as the yanagiba, deba and usuba have an edge on one side only, which changes how you sharpen them. Here is the basic routine in 8 diagrams. Thickness is exaggerated on purpose.
These steps are for single-bevel knives (yanagiba, deba, usuba). Do not use “lay the bevel flat” or “lay the back flat” on a double-bevel knife such as a santoku or gyuto: it will not put an edge on it and can scratch the blade. A guide for double-bevel knives is coming.
A left-handed single-bevel knife has the front and back reversed. Swap left and right in these steps.
Safety first
- Work slowly on a steady table. The stone must not slide (step 3).
- Keep your fingertips on the flat of the blade, behind the edge. Never on the edge itself.
- Never test sharpness by sliding a finger along the edge.
- Keep children and pets away, and put the knife down flat when you stop.
1. Know your single-bevel knife
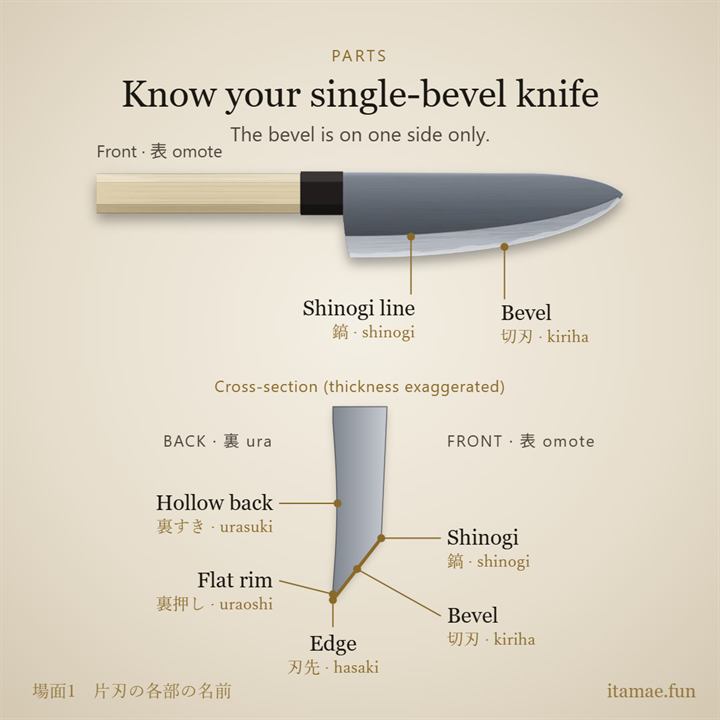
- Front (omote): the side with the bevel. Bevel (kiriha): the wide, angled face down to the edge. Shinogi line: where the bevel begins.
- Back (ura): the other side. It is not flat: a slight hollow (urasuki) in the middle, with a narrow flat rim (uraoshi) around it.
- You sharpen the front a lot, and the back only a little.
2. Choose your whetstones
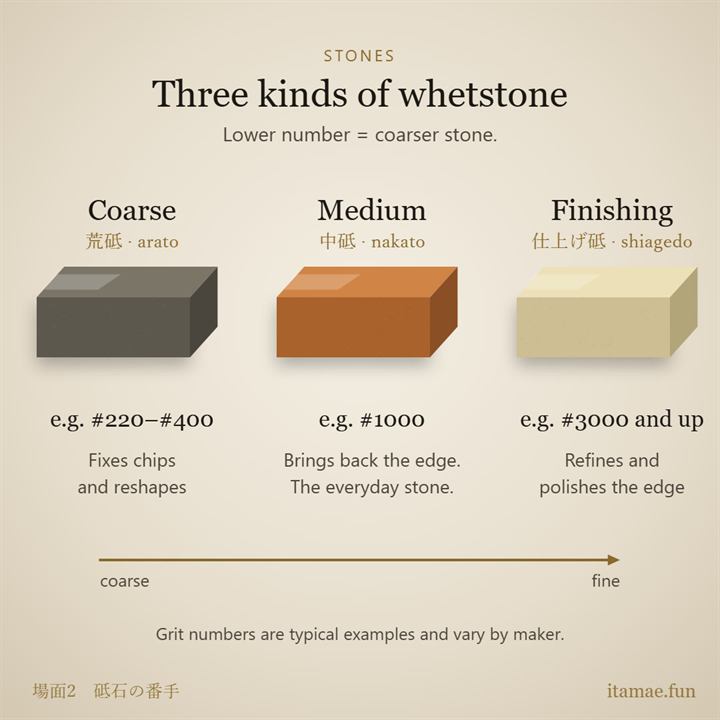
- The lower the grit number, the coarser the stone.
- Coarse (about #80–#400): fixes chips and the shape. It removes a lot of steel, so do not overdo it.
- Medium (about #1000–#2000): smooths coarse scratches and puts on an everyday edge. The stone you use most.
- Finishing (about #3000 and up): refines and polishes the edge. Also used for the back.
- Grit numbers are examples and vary by maker. If you buy only one, buy a medium stone. In a professional kitchen, a coarse and a finishing stone are worth having too.
3. Prepare the stone
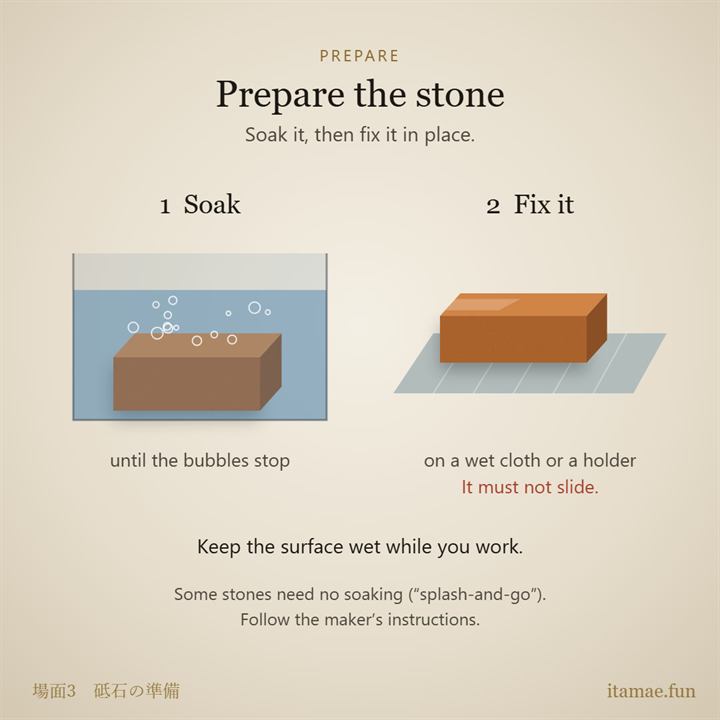
- Many stones are soaked first. Leave it in until the bubbles stop.
- Fix it on a wet cloth or in a holder so it cannot slide. Keep the surface wet while you work.
- Some stones are used with just a splash of water. Always follow the maker's instructions.
- Some stones must not be soaked (you only wet the surface before use). Check the instructions that came with the stone, especially for finishing stones.
4. Lay the bevel flat
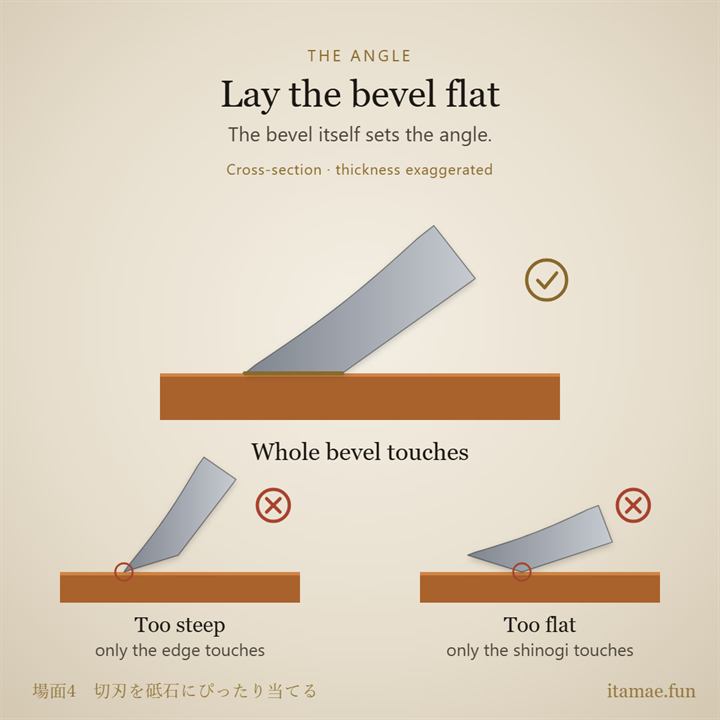
- The key idea: on a single-bevel knife, the bevel itself sets the angle. No need to think in degrees. Lay the whole bevel flat, from the shinogi line to the edge.
- Too steep: only the edge touches. Too flat: only the shinogi touches. Either way, you are not sharpening the whole bevel.
5. Work one section at a time
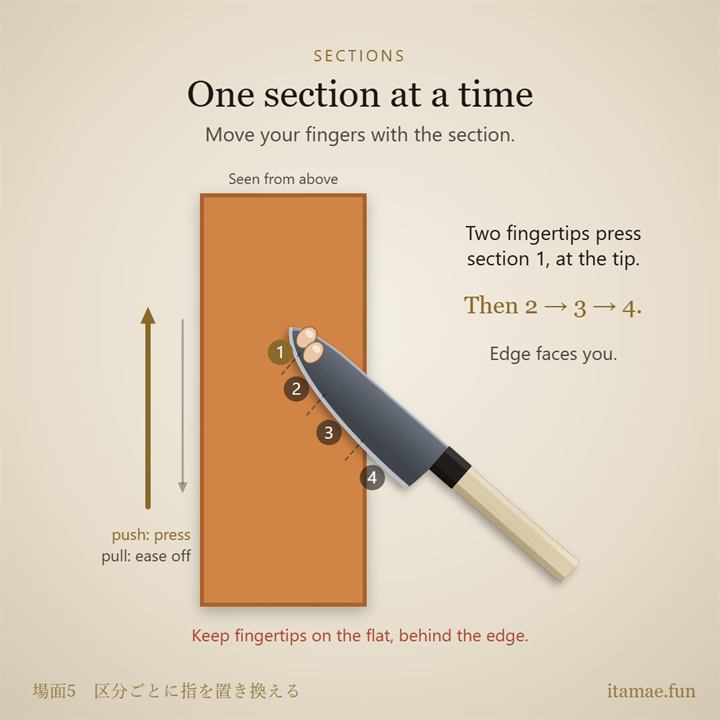
- Lay the knife across the stone, bevel down, edge facing you. Divide the edge into four sections.
- Start at the tip. Press section 1 with two fingertips and stroke along the stone. Press as you push away, ease off as you pull back.
- Move your fingers to sections 2, 3 and 4. Keep your fingertips behind the edge.
6. Feel for the burr
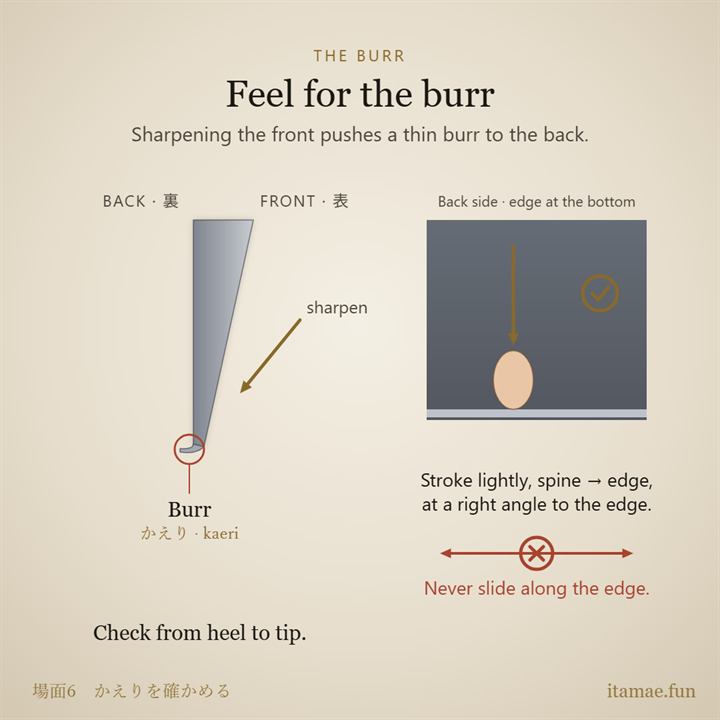
- Sharpening the front pushes a very thin lip of metal over to the back. This is the burr (kaeri), the sign the front is done.
- With the pad of your finger, stroke lightly across the back, at a right angle to the edge, from the spine side toward the edge. Never slide along the edge. Check from heel to tip.
7. Sharpen the back, lightly
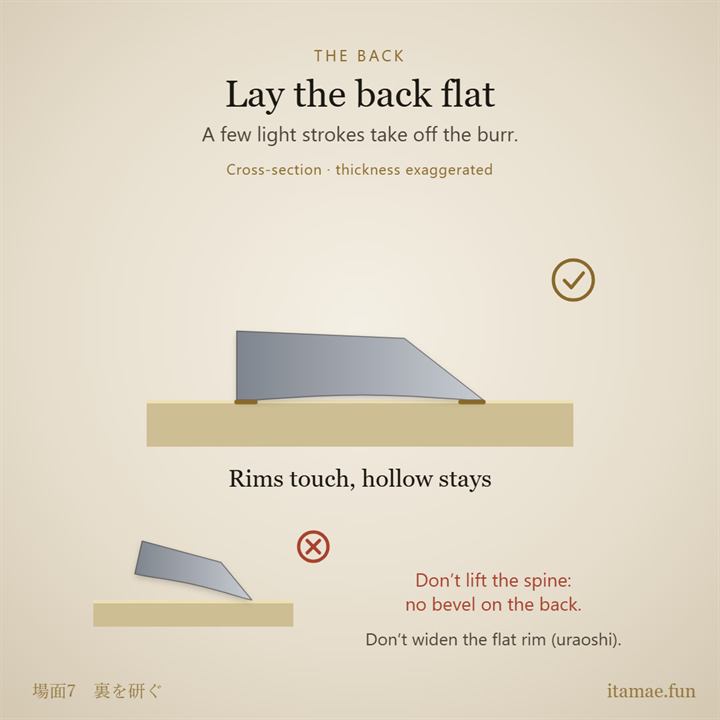
- Turn the knife over and lay the back flat on the finishing stone. The flat rim touches; the hollow does not.
- A few light strokes take off the burr. Do not lift the spine (that puts a bevel on the back). Too much widens the flat rim.
8. Finish and test
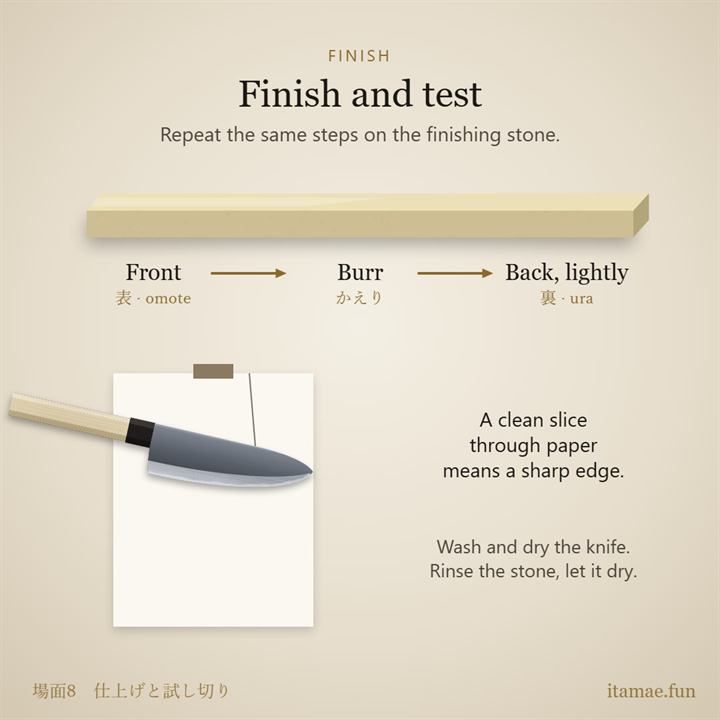
- Repeat on the finishing stone: the front, check the burr, then the back, lightly.
- Take off the last of the burr on newspaper. Test on a sheet of paper: a clean slice means a sharp edge. Keep fingers away from the blade's path.
- Removing the burr on newspaper: lay the blade flat on newspaper spread on the table and draw it lightly toward the spine. Never push the blade forward, edge first.
- Wash and dry the knife. Rinse the stone and let it dry.
Where chefs do it differently
- The exact angle in degrees (the bevel sets it).
- How long to soak a stone (until the bubbles stop is enough).
- Rounding the bevel slightly or adding a small second bevel, which some chefs do on a deba. This guide keeps the bevel flat.
A free app made by an individual itamae. Not endorsed by any maker or shop. Some links are affiliate links. Steel and product names are trademarks of their respective owners. This app is not endorsed by any manufacturer or store.